Create and format body text for the first article
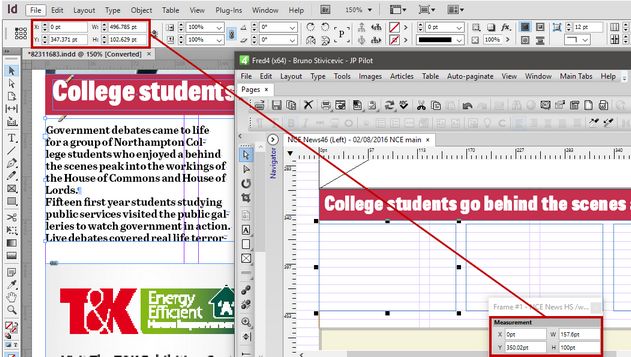
Another case where you cannot rely directly on InDesign measurement: InDesign measures the width of all three body text boxes "as-one", while Fred measures them separately. Moreover, we want to keep the shapes on grid whenever possible. Therefore, W field, H field and Y field all shows slightly different values but this will probably not be a problem as the differences are really small.
To create body frames
1.Press F and then drag over four columns.
2.Adjust, if necessary, the values as on the previous screenshot.
3.Press 3 to resplit in three columns.
To get the body formatting
Double click in the body text on the InDesign page, and then read the values in the Control palette. See How to read InDesign Control palette for text? for more details.
To create a body format in EdAdmin
In EdAdmin4 create a format in the appropriate typography, and name it as you want. See more in About format naming. Then, by means of the Character... and Paragraph... buttons, enter manually the same values you did test on page.
To apply format on the body frames and test it
1.After you saved the new format in EdAdmin4, return to Fred.
2.On the View menu, point to Refresh and then click Format.
3.Select all three body frames.
4.On the Format toolbar, locate and select the new body format you created.
Note: if you cannot find the new format, it means that the refreshing of the formats failed. Make sure you are not in the text editing mode, and then retry.
5.Link the body of the article you created in Create a GN4 article from InDesign's one step.
Final comparison
Perform a final comparison between the InDesign body and the Fred's one, following the instructions in How to compare the original and Fred objects?.
u Proceed to the next topic in the table of contents.

