Frontpage header

Contents
This is a sample of an advanced frontpage header design. In many newspapers, the "publication name" element resides on a masterpage, but for this particular example you can't choose that approach - as there are content elements behind the publication name.
While in Fred4 you can put master guides in front of content elements, it's not possible to do the same with the master content.
Thus, in this case we assume that the publication name is a "normal" page element, put either on the same layer where other elements reside, or on a separate, "fake-master" page layer.
Notes
•In the below steps you will use sidebar palettes for page and text elements. If you can't find or locate them, look at Palettes topic for further instructions.
•Wherever steps instructions state "confirm", it corresponds to press the Enter key or click the confirmation icon ![]() .
.
The top teaser can be created as a blue box overlapped with a smaller frame, or as a colored frame with appropriate margins to shift text down and right. Preparation 1.Read the type size from PDF as explained in Getting type size and leading. In this example, the type size is 22pt, and the font is MillerHeadline-Roman, but you can use Times New Roman. 2.Select the teaser text and copy it on the clipboard. 3.Measure the box height as explained in Measuring page elements in Acrobat. In this example, it's about 28pt. Top teaser as "box with frame" 1.Press B to start to draw a box, and then draw from the left page edge over page width (a productivity tip: draw any box, and then press SHIFT+CTRL+W to extend it to the page width). 2.In the Height box of the Measurement palette enter 28pt and then confirm. 3.On the Area/image colors palette, select the appropriate color for the box fill, and confirm. 4.On the Rule & Dash palette, in Weight select 0, and confirm. This removes the border from the box. 5.Right click the box and then click Add frame to. This adds a default frame slightly smaller than the box. 6.Drag the frame for the left middle handle to right, to uncover it under the horse. 7.Double-click the frame in Fred4, and then press CTRL+V to paste the text on the clipboard. 8.Press CTRL+A to select all text, and then enter the appropriate type size in the Size box on the Text font palette in Fred4. Select Times New Roman. Confirm. 9.While text is still selected, on the Text Color/Effects palette, on the Color, select White color and confirm.
Now, as you can see, you are almost done: it's just that the text is too wide for the horizontal space. So, let's narrow it, step-by-step. 1.Double-click the frame and then press CTRL+A to select it all. 2.Hold ALT, and then press repeatedly the "[" key - US keyboard or "è" key - Italian keyboard, to shrink the character width. If it gets too shrunk, press CTRL+same key to increase the width.
Top teaser as a frame with margin Should you prefer to create the top teaser as single frame with margin, do following: 1.Press F to start to draw a frame, and then draw from the left page edge over page width (a productivity tip: draw frame, and then press SHIFT+CTRL+W to extend it to the page width). 2.In the Height box of the Measurement palette enter 28pt and then confirm. 3.On the Area/image colors palette, select the appropriate color for the fill, and confirm. 4.Double-click the frame in Fred4, and then press CTRL+V to paste the text on the clipboard. 5.Press CTRL+A to select all text, and then enter the appropriate type size in the Size box on the Text font palette in Fred4. Confirm. 6.While text is still selected, on the Text Color/Effects palette, on the Color, select White color and confirm. 7.Locate the Paragraph general palette in the sidebar, and then in the under Indents > Left enter the desired left indent, e.g. 60pt. In the right box enter 1. Confirm and look at the position of text. If it's not indented enough, roll the mouse wheel forward to increase. 8.Hold ALT, and then press repeatedly the "[" key - US keyboard or "è" key - Italian keyboard, to shrink the character width. If it gets too shrunk, press CTRL+same key to increase the width. 9.Locate the Justification palette in the sidebar, and then enter the margin value in the Border Align box. Confirm. Note: You may also use CTRL+M to increase margin, or ALT+M to decrease it. |


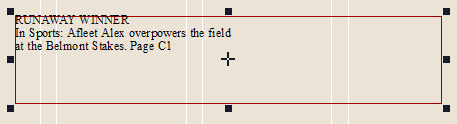
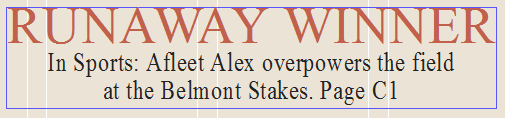
Preparation 1.Read the type size from PDF as explained in Getting type size and leading. The headline size is 39pt, and the intro size is 16pt. 2.Select the text and copy it on the clipboard. 3.Measure the frame height and width as explained in Measuring page elements in Acrobat. In this example, it's about 63pt and 310pt. Create the element 1.Press F and draw a small frame on approximately correct X and Y position. 2.In the Height box of the Measurement palette enter 63pt, in the Width box enter 310pt and then confirm. 3.Double-click the frame to enter editing, and then paste the text.
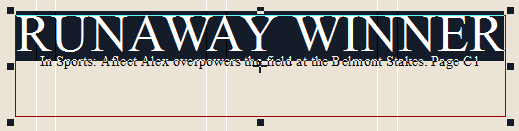
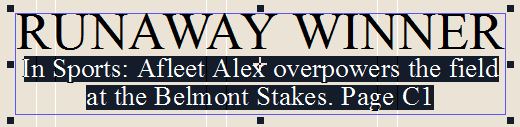
The text, obviously, is to be formatted, and also the unnecessary end-of-paragraph between the "field" and "at" is to be deleted. Then, press CTRL+A to select all, and then SHIFT+CTRL+C to center in the frame. Select only headline, and then press CTRL+full stop until it fills the frame width (if it wraps, press ALT+full stop to step back).
Select the second line, and then press CTRL+full stop until it fills the frame.
As you can see on the example, the original text is pretty much narrower. Therefore, while it is still selected, press ALT+[ or é to shrink it, and then also select the headline and apply the Red color, about 70% of shade.
|
Preparation 1.Read the type size from PDF as explained in Getting type size and leading. The headline and description size is 16pt. 2.Select the text and copy it on the clipboard. 3.Measure the frame height and width as explained in Measuring page elements in Acrobat. In this example, it's about 65pt and 160pt. A quick way to create the frame on the right position is to press D key while the Winner... frame is selected (not in editing of text). This creates a duplicate of the same frame, on 1 gutter distance. Then, double-click the frame to start editing, and then press CTRL+V to paste the clipboard. Select all and then apply 16pt type size on all. Select headline and press SHIFT+CTRL+B to bold it. Switch to Runaway frame, click in smaller text and read in Text font palette what's the actual character base. Replicate that value on the In Weekend Life text. To add the vertical rule Select left frame and then press ALT+R, or select the right frame and then press ALT+L.
|