Assign a quota to a partition
Use EdAdmin4 to assign a quota to a partition.
1.Edit a partition as explained in Edit partitions.
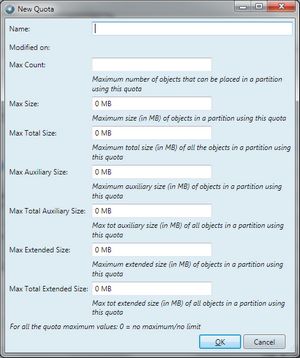
2.Click quota list to assign an existing quota, or click the  button to create a new quota and assign it to the partition.
3.In Name, enter the unique name for that quota preset. This name will appear in the drop-down list of quotas on the partition dialog box.
4.In Max Count enter the maximum number of objects allowed in that quota, or leave empty to allow any.
5.In Max Size enter the maximum size of any object allowed in that quota, or leave 0 to allow any.
6.In Max total size enter the maximum total size of all objects allowed in that quota, or leave 0 to allow any.
7.In Max Auxiliary Size enter the maximum auxiliary size of any object allowed in that quota, or leave 0 to allow any.
8.In Max total Auxiliary size enter the maximum total auxiliary size of all objects allowed in that quota, or leave 0 to allow any.
9.In Max Extended Size enter the maximum extended size of any object allowed in that quota, or leave 0 to allow any.
10.In Max total Extrended size enter the maximum total extended size of all objects allowed in that quota, or leave 0 to allow any.

