Create a clipping path in Photoshop for the selected image on Fred's page

Contents
You can create a clipping path in Photoshop, by opening a picture from a Fred's page.
This requires that the Photoshop plug-in is installed on your computer (see Using Adobe Applications with GN4 for more information about plug-in).
•GN4 version 1.6.1815 or newer.
Create a clipping path in Photoshop (versions CS6-CS6)
1.Run Photoshop CS5, CS5.5 or CS6 and then sign in to GN4 (Window > Extensions > GN4).
2.In Fred, open the page with the picture you want to create the clipping path for.
3.Right-click the picture and then select Edit in Photoshop.
4.Wait until picture loads in Photoshop.
5.Create a clipping path (see the Adobe help for the instructions about how to create a clipping path, or see more below for the instruction for Photoshop 2015 CC).
6.Save the picture in Photoshop and the picture is automatically updated on Fred's page.

Note
•The image is automatically refreshed on page in GN4 version 1.6.1815 or newer. In previous versions, you may need to delete the image from page, and then replace it.
Open the image from the folder on disk, or (by means of the plugin, from the database folder).
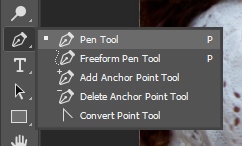
Select the Pen tool.
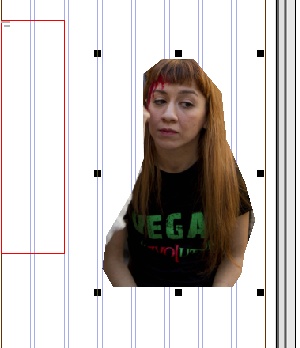
Click around the zone you want to take to form the path, and then click the starting point to close the path (in this example we made a very rough path):
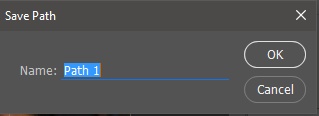
Click the menu icon on the Paths palette to save path.
Accept the name and click OK.
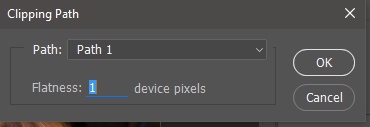
Click the menu icon again and then click Clipping path:
Specify Flatness if you want and then click OK.
File > Save As.
Set options and then click OK.
Drag the image from the folder on the Fred page (a recent 2.3 required):
Wait until it uploads, and then when prompted, click Finish:
The clipped picture appears on page:
|