Using SVN as source control

Contents
It is highly recommended to use the source control when reconfiguring GN4 configuration files.
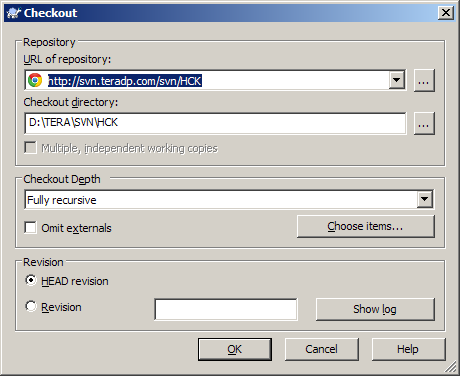
1.Download and install the Tortoise SVN client http://tortoisesvn.net/downloads.html. 2.Create a folder on your local drive for the repository, such as c:\tera\SVN\<sitename>. Note: to connect to an existing repository, you may want to ask Tera support what's the name of the folder. 3.Right-click the <sitename> folder and then select SVN Checkout.... This displays the Checkout dialog box:
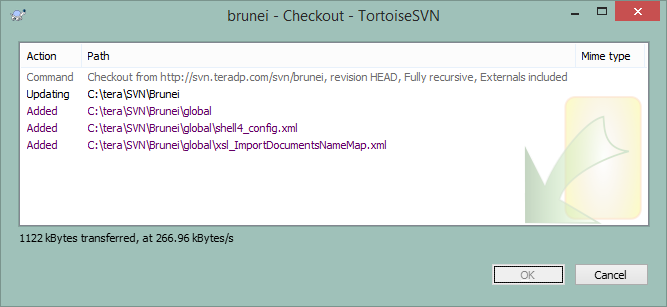
4.In the URL of repository, enter http://svn.teradp.com/svn/<sitename> (BEWARE: the name is CASE SENSITIVE!) and then click OK. Note: if you don't know the name of repository, contact support@teradp.com. 5.At this point you may need to enter the credentials to connect to the repository. If you don't have one, contact support@teradp.com and request credentials. 6.A dialog box with the name of the repository is displayed, and in a short while, it starts to download items from the repository to your local drive:
7.Wait until all files are downloaded and then click OK. The files in this folder will be marked with special SVN icons once the Windows File Explorer is restarted. The green icon means that the file is up to date and synchronized with the central repository. A red icon means that the file has been modified locally and it needs to be submitted to the repository. All operations are on the right-click context menu. |
To add a new file 1.Drag the file in the SVN folder on your local drive. 2.Right click the file and then on the TortoiseSVN menu, click Add. A + icon will appear on the file. This state means that the file has been added locally and it still need to be committed. |
To commit a file 1.Do one of the following: •To commit entire folder, right-click the folder and then click SVN Commit. •To commit a single file, right click the file and then click SVN Commit. 2.Remember to type in a note that describe the changes. The committed file is kept in the Tera repository (which is also backed up each night). |
Before starting to edit any file, right-click it and then select SVN Update to make sure you work on the up-to-date version of the file. When you modified a file in the local folder, the SVN icon on the folder becomes red. This is a reminder that the file was locally modified and it still need to be committed. |
To apply the changes 1.Log into the customer server. 2.Right click the SVN folder and then select SVN Update. 3.Wait for the synchronization to complete. 4.Import the configuration file into the database. |