Overlapped free-form boxes

Contents
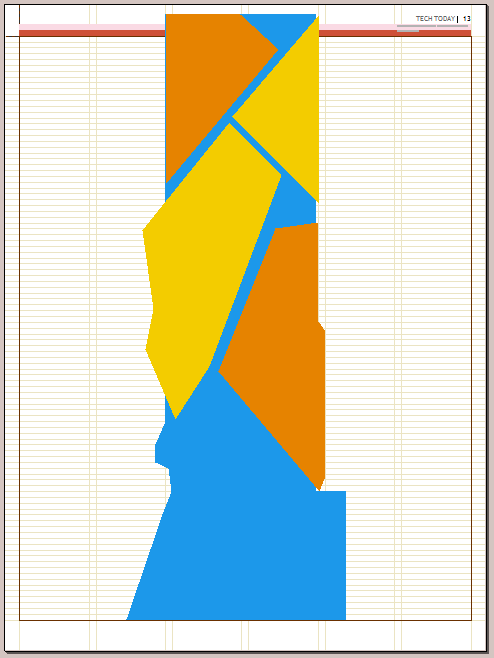
Let's see how you can create such complex drawing in Fred that consists of the free-form cyan background, overlapped with 4 free-form boxes in different colors.
Select the right approach
You can apply three different methods:
1.Use the pen tool to draw the closed-path shapes and then move them where you want.
2.Draw the boxes, and then use the polygon tool to convert them in a free-form boxes.
3.Use the cutter to cut the foreground boxes.
The drawback of the first and the second method is that it would be difficult to get parallel and aligned edges, as there is no option to align points or specify the gap between them.
On the other side, that is very easy with the third method, but its drawback is that you have to do cut-ins before putting the background (otherwise, the background would be cut too).
For all the methods it is recommended to turn on the snap to guides at the beginning, to be able to align the shape corners, but to turn them off later for a fine adjustments. This will let you manage the shape points more easily.
This topic explains the procedure #2: using boxes to create the foreground shapes and then convert them into free-form boxes.
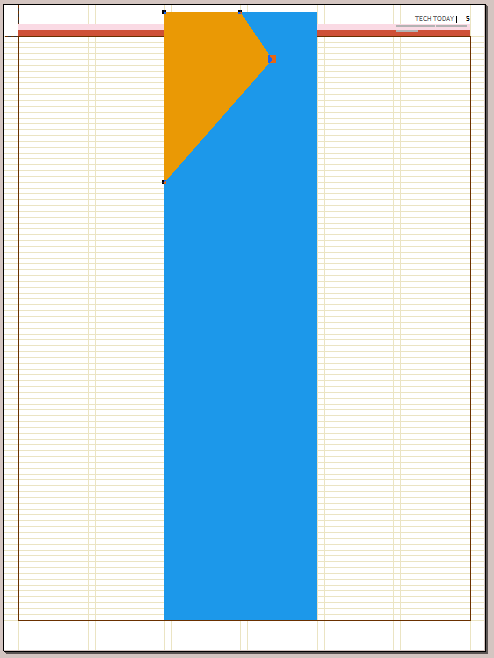
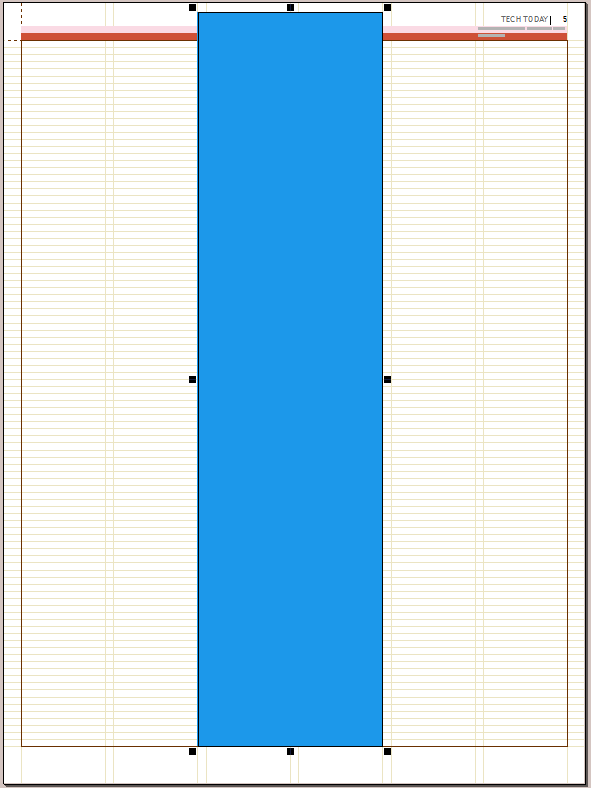 The first step is to draw a box, over central two columns, almost high as the page, overlapping on top a bit the dateline
Apply to the box a cyan fill color.
You may also want to press ALT+0 to remove the default box border.
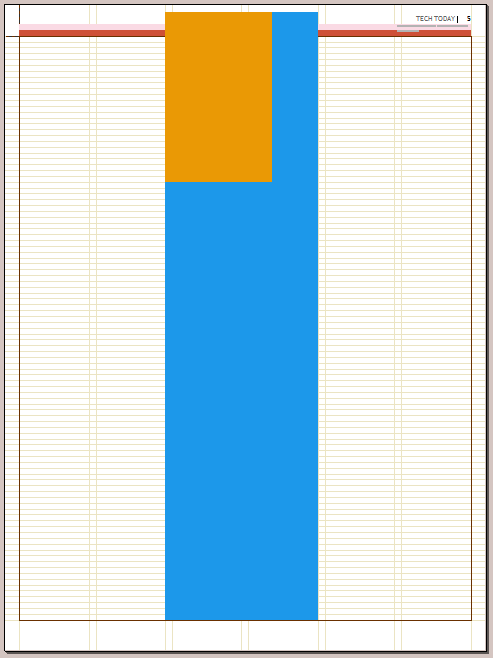 The second step is to create a top left box aligned with the background box.
Apply the orange color to the box.
You may also want to press ALT+0 to remove the default box border.
 Now, while the box is still selected, press P to switch to the polygon tool.
At this point you may want to disable snap to guides.
You may also want to press ALT+0 to remove the default box border.
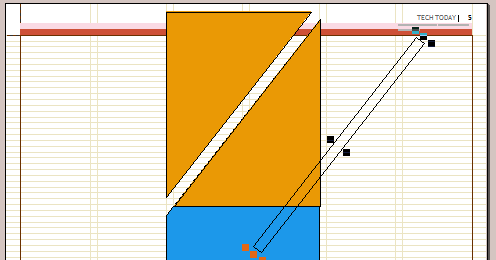
Select the right bottom corner of the box, and then press the Del key. This converts the box in the triangle, but it still doesn't look like as it should.
Hover over the box top edge in proximity of the 4th column guide, and when the pointer turns into + sign, click to add a point on the shape.
Now, click the rightmost point, and drag it down until the shape looks like you want.
Press N to return to the normal tool.
 Draw another box, aligned to the right edge of the blue background.
You may also want to press ALT+0 to remove the default box border.
Press P to switch to the polygon tool.
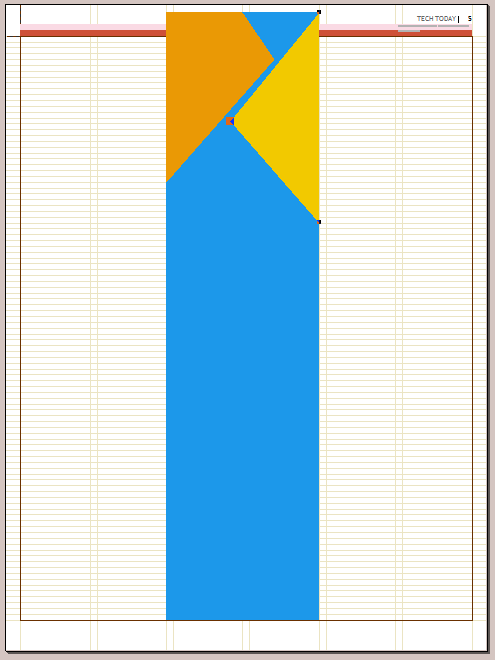 Select the top left corner, and then press the Del key.
This converts the box into triangle.
Drag the bottom left corner so the top edge of the yellow triangle gets parallel to the bottom edge of the orange orange triangle.
There is no way to measure the distance - do it visually.
Continue to do so until you place other two boxes.
Then, with the Normal tool, select the cyan background, switch to the polygon tool, and then add the points on the cyan background and drag them to achieve the form you want.
Notes
If you want to use the cutter instead to shape boxes, first design a box over entire width of the background and apply a color on it. Then, create a transparent box, whose height equals to the desired gap. Rotate the transparent box so it covers the diagonal of the orange box.
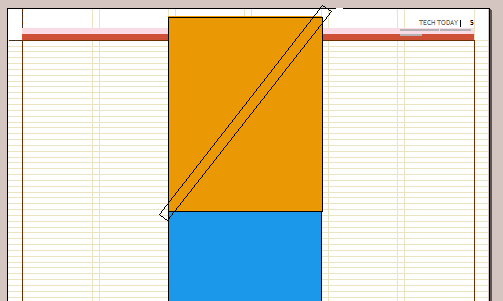
Press Alt+C to create a cut-in. Please note that the cyan background is cut too. Move out the transparent box, and then rotate is as needed to create another cut.