Place graphics by name and folder

Contents
This method explains how to place ready graphics, selecting it by name or folder. This assumes you know where the graphics is in a workflow, or the exact name of the graphics element.
To place an existing ready graphics by name and folder
On the Images menu, click Insert, and then select the folder, or enter the exact name of the ready graphic in the database.
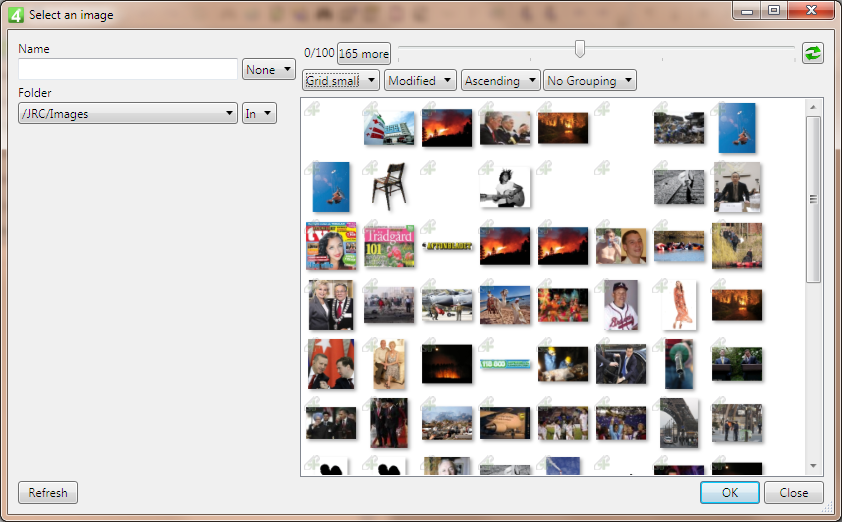
Select the display format (configurable). Typically choices are:
•List
•Grid small
•Grid large
Arrange the display (configurable). Typically choices are:
•Modified
•Name
•Folder
Moreover, you can order them ascending or descending.
Optionally, select Grouping (will group by folder).
Select a graphic, and then click OK.
If you are on the Pages main tab:
If nothing was selected on page, move the normal tool ![]() where you want and then click to place graphics in the original size.
where you want and then click to place graphics in the original size.
If a image frame was selected on page, select the adjustment mode to the frame and then click OK to put the graphics in the image frame.
If you are on the Articles main tab:
If nothing was selected on page, move the normal tool ![]() where you want and then click to place graphics in the original size.
where you want and then click to place graphics in the original size.
If a image frame was selected on page, select the adjustment mode to the frame and then click OK to put the graphics in the image frame.