Prepare images for channels

Contents
You need to prepare images for Web publishing. The most basic level of preparation is to crop every article image, designated to be published on Web for the appropriate image box on a Web page. An example: your article has one image you want to publish on Web. Let's assume that your Web pages contain not more than 3 different image boxes with the following dimensions: 190x150px (to be used when article appears on the home page), 160x100px (to be used on home page, but for portraits and other vertically oriented content), 110x83 px (to be used when article appears as side-box), and 300x200px (for the page where entire article is displayed). As the proportion of the boxes is often different, to ensure that the appropriate part of the image is displayed whichever position article takes on Web page, you need to crop the image 4 times - once for each box.
A multi-crop feature offers a handy way to do it.
You can run multi-crop in various ways:
1.On the Publishing main tab, after opening a destination, by selecting an article with images and clicking the 'multi-crop' toolbar icon; or selecting the Multiple crop option on the Destinations menu.
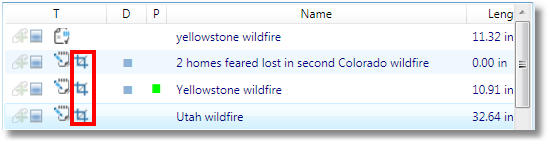
2.On the Content navigator, by clicking the multi-crop icon in the listing:
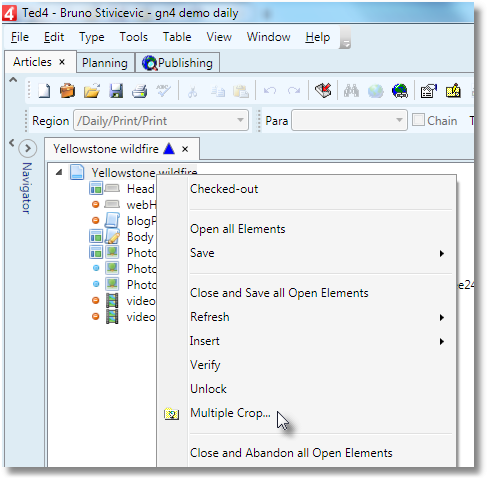
3.On article tree, during editing of an article, by right-clicking the article root, and selecting Multiple Crop...; or selecting Multiple Crop under Publish menu on the File menu.
The multicrop dialog box
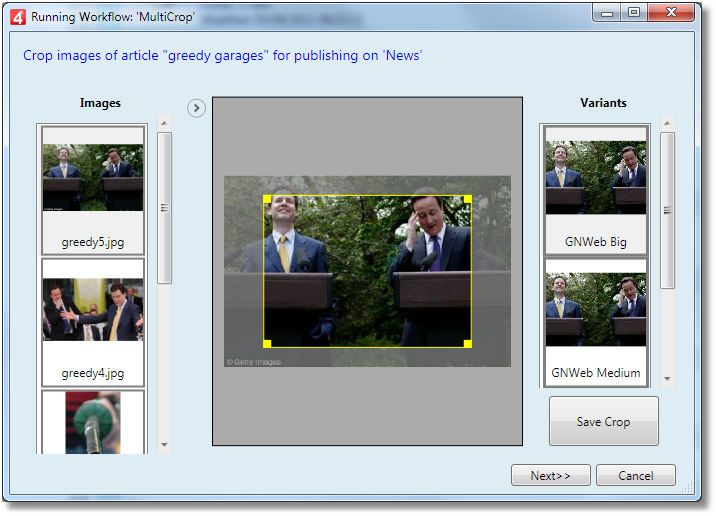
The Multi-crop dialog box shows:
•In the left zone: the list of images linked to the article (as thumbnails)
•In the central zone: the currently selected image
•In the right zone: the list of image variants, bound to the current Web page (publishing destination). See the paragraph "Binding variant types to the publishing destination" in the Configuring multicrop topic, to learn how to bind variants to the specific Web page.
When the user selects a source image on the left zone and a target variant on the right zone, then the source image is displayed in the central zone and a crop frame over it.
After you set the crop frame, click the Save Crop button (under the variants list). The crop preview is displayed in the right zone. You can recrop the variants as many times you want.
You can assign images to variants only as "one-to-many", but not as "many-to-one". In other words, while you can assign one image to all variants, you cannot assign two images to the same variant.
Click Next to proceed.
See also