Copy images from PDF file
When using Acrobat 9 or newer, you can copy images from PDF file and load them in your system.
1.Click the image with the normal tool 2.Right-click and select Save Image As. 3.Select an appropriate folder for image, and specify an appropriate name. Choose JPG as the format. 4.Import the image in GN4 as explained in Import images for your work. |
Sometimes Acrobat doesn't let you to select an image or an ad. It happens with the images that are clipped and re-processed by PDF. In such a case, increase the PDF zoom until it fills the screen, and then use the Snipping Tool to get the screenshot. Save the screenshot as JPG. Import the image in GN4 as explained in Import images for your work. |
1.On the Tools menu, click Export PDF, and then click Image, and then tick Export All Images. 2.Select folder, and then specify the name. The exported images are automatically numbered to provide uniqueness. 3.Import the images in GN4 as explained in Import images for your work. |
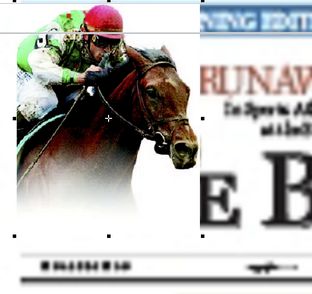
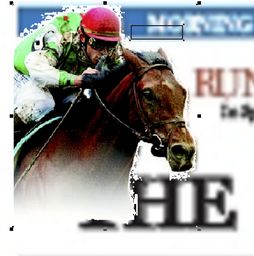
When a clipped image is exported from PDF, it will arrive in GN4 as image with a white background, and won't be clipped anymore. Thus, it may overlap the content / drawing that on the original page was under the transparent part of the image. You have two choices: a)To attempt to clip the image in Fred4. b)To clip the image in Photoshop and then re-upload it to the database. |
Draw a small box over the white space on the image, and then select first the image, and holding SHIFT, select also the box. Right-click and select Trace (if you don't see the Trace option in the menu, it may be that the box is selected as the first object, and not the image). In the dialog box select what you want, having in mind that Hull and Convolution typically give better results than Parallel. Anyway, the result may be not what you want, as shown on the following screenshot. In such case, you can try to increase the Simplification order, or even to edit the nodes manually. |
1.Load a image in Photoshop, and then with the "magic wand" tool click on white zone to create selection. If the selection is too rough, or there's any other reason to adjust it, change the value in the Tolerance box in the toolbar, click outside to unselect, and then click again on white. 2.On the Select menu, click Inverse. 3.On the Paths palette, click the side button, and then click Make work path, and accept of change the value of Tolerance. 4.On the Paths palette, click the side button, and then click Save path, and give any name, e.g. Path 1. 5.On the Paths palette, click the side button, and then click Clipping path, and accept the proposed name, e.g. Path 1. 6.Save the image as JPG or as EPS, with preview 8-bits/pixel. 7.Import the image in GN4 as explained in Import images for your work. |


