Apply radial shading with custom origin and shading speed

Contents
To assign a radial shading to the color fill, click the arrow icon to expand the Area/Image color palette, and then do following:
1.In the color A list, select the starting color.
2.In the color B list, select the second color. If it's the same as the first color, then you have to specify the different tint. If you select [None] it will shade to no color.
3.In Fill, select Radial gradient.
4.Press SHIFT+H, and then click within the object where you want, to set the shading center (hot-spot).
To reset to center of the object, on the Tools menu, point to Hot-spot and then click Reset to center.
5.Move the Speed slider on the right to give more space to the A color, or to the left, to give more space to the B color. The value of 50% distributes the color shading evenly.
6.Click the confirmation icon ![]() or press 8.
or press 8.
If you need to change the tint of the color, use the tint box to set a number between 0% (color behaves as "no color") and 100% (full color).
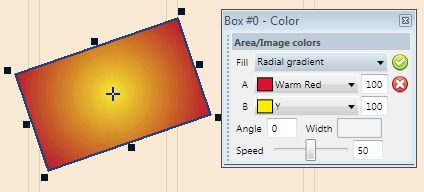
Figure 1: The hot-spot is in the center of the object, and the color is distributed evenly.
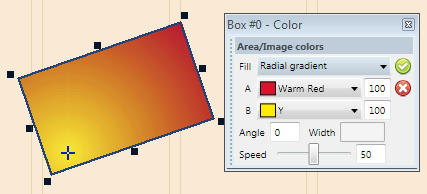
Figure 2: The hot-spot is close to the bottom left corner of the object, and the color is distributed evenly.